


Ready to upgrade your garage with a fresh, durable floor? In this blog, we’ll show you how to achieve a professional finish with Haydn painting and decorating tools. From prep to the final coat, we’ll guide you through each step to transform your garage into a beautiful and functional space!
Let’s dive together into this practical four-step DIY project.
Choosing the Right Product & Following the Steps
Painting your garage floor is a great way to enhance durability, improve aesthetics, and make cleaning easier. There are several reputable products available to get the job done, each with its own benefits and application process. For our project, we chose the Rust-Oleum Concrete & Garage range, which provided a durable and professional finish. In the video, we walk through the step-by-step process of applying it. However, every product has unique instructions, drying times and preparation requirements, so it’s essential to carefully follow the guidelines specific to the one you choose. Proper surface prep and application will ensure a long-lasting, high-quality result!
Before You Begin: Preparations and Checks
Before you begin, there are a few important things to check on your floor:
Check for Sealers: Splash water on the concrete. If the water beads, your floor has a sealer. For previously sealed surfaces, you’ll need to grind or sand off the old coating completely. Alternatively, you can use Recoat Primers available in the market, but always follow the product’s instructions for the best results.
Check for Moisture Issues: Tape a vapour barrier or plastic sheeting to the floor for 24 hours. If moisture or condensation appears, address it using a moisture stop product. Consult a professional for guidance on the ideal product for your floor.
Check the Weather: For best results, ensure the temperature is between 10°C and 32°C, with humidity below 85%. Avoid applying the coating if rain is expected within 48 hours. This was the guideline for our project, but every product has its own weather requirements, so always refer to your chosen product’s instructions before you begin.
Once you’re ready, clear everything out of the garage. The project takes a few days, so store your items safely.
Step 1: Cleaning and Prepping the Floor
Gather the following tools and products:
- Cleaner & Etching floor product
- Haydn® 300mm Scrubbing Brush
- Haydn U-Can Handle Bucket
- A long handle squeegee
- A hose

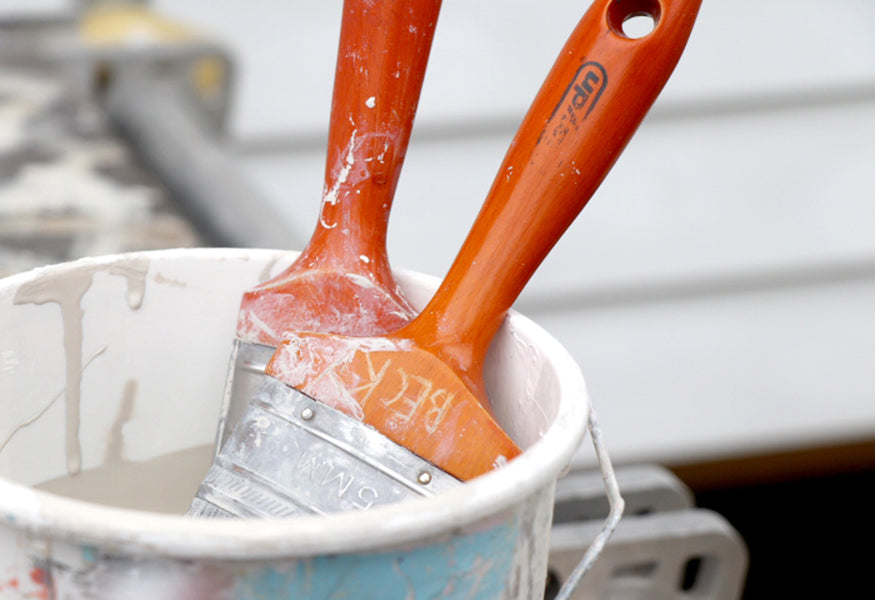
Begin by sweeping away any dust or debris. To tackle heavy stains and etch the floor for better coating adhesion, we used a Clean & Etch solution. Pour the solution into a Haydn 10L White Bucket, dilute it with an equal amount of water, and sprinkle it evenly over the floor. Using the Haydn 300mm Scrubbing Brush, scrub the surface thoroughly. You may notice the solution fizzing—this is normal. Rinse the area well with clean water, repeating the process twice to ensure no residue remains. If there’s no fizzing, wait 5 minutes before rinsing. Allow the floor to dry completely for 24 hours. If you're short on time, speed up the drying process with the Haydn Industrial Dehumidifier and Haydn Industrial Fan, as any remaining moisture can lead to adhesion issues later.
Once the floor is fully dried, repair any cracks or holes in the concrete using a concrete patch product and the Haydn Professional Scraper. Remove debris with the Haydn Duster Brush before applying the patch. Use the scraper to spread and level the epoxy over damaged areas and let it dry as per product instructions.

Step 2: Priming the Floor
For priming, you’ll need:
- Haydn Heavy-Duty Paint Tray with Plastic Paint Tray Liners
- Haydn 63mm Haydn Trade Blazer Angled Paint Brush
- Haydn Professional Extension Pole
- Haydn Professional Draylon 10mm nap Roller Sleeve
- Haydn Premium Roller Handle Frame
- Garage Floor Recoat Primer of your choice


If the floor was previously sealed, use a Recoat Primer. Bare concrete does not need priming. Starting from the back of the garage, trim the edges with the angled paint brush, working in 4m x 4m sections. Use the Haydn Professional Draylon Roller Sleeve with the Haydn Professional Roller Sleeve to roll on the primer, ensuring even coverage with a W and M pattern. Let the primer dry for at least six hours but no longer than 48 hours before applying the topcoat.
Step 3: Applying the Garage Coating
For this step, you’ll need:
- Garage Floor Paint
- Haydn 63mm Trade Blazer Angled Paint Brush
- Haydn Professional Draylon Semi-Rough 10mm nap Roller Sleeve
- Haydn Premium Roller Frame and Extension Pole
- Haydn Can Opener
- Haydn 10L White Bucket
- Haydn Stirrer with holes or the Haydn Paint & Compound Mixer


Open the paint can with a Haydn Can Opener. For consistent colour, mix the paint cans you will be using in the Haydn 10L White Bucket. Stir the paint with the Haydn Stirrer or for a faster process, use the Haydn Paint & Compound Mixer with a drill and pour it into the paint tray. Cut in the edges of a 1.2m x 1.2m section with the angled paintbrush, then roll on the paint with the roller sleeve. Maintain a wet edge and avoid gloss differences.

If using decorative chips, toss them into the wet coating as you work each section. Leave a 15–30cm section of wet film without chips to blend with the next area. The decorative chips are a great way to enhance the look of your floor and help hide any surface imperfections. Let the floor dry for 24 hours before applying the topcoat.
Step 4: Adding the Clear Topcoat
Extend the life of your coating with a clear topcoat. You’ll need:
- Clear Garage Floor Topcoat
- Haydn 63mm Trade Blazer Angled Paint Brush
- Haydn Professional Draylon 10mm nap Roller Sleeve
- Haydn Professional Extension Pole
- Anti-skid additive (optional)
![]()
![]()
Mix the clear topcoat and an optional anti-skid additive to avoid slipping. Trim the edges with the angled paintbrush and roll the topcoat evenly using a W and M pattern. Allow 12 hours for light foot traffic, 24 hours for heavy foot traffic, and five days for vehicle use.
Your transformed garage is now ready—beautiful, durable, and built to handle anything! For detailed information about Haydn products, visit haydn.co.nz.