


Christmas is just around the corner so more than enough reason to let the Christmas crafts begin and start decorating. We tried our hands on some super easy DIY decorations and will add a new crafty treat to this blog every week until Christmas. Let's get you set up for the festive season.
1. Pallet Christmas Tree

Whether you have a toddler roaming your living room or you simply don’t have space for a large tree this year, our first DIY trick will make sure you still get your Christmas fix. All you need to get started is a wooden pallet, saw, left over paint and some Christmas ornaments, lights and tinsel….
Step 1. Grab a ruler, place with the pallet with its boards horizontally and trace a triangle shape from the bottom corners to the centre of the top board.
Step 2. Saw along the outlines. Then use some of the cut offs to stabilize the tree from the back and to form a base for the tree to stand on.
Step 3. Sand down the edges and tops before getting on the painting gear.
Step 4. Paint the tree in your colour of choice, let it dry then attach lights and Christmas ornaments to finish of your DIY tree.
For our trees we created one using green spray paints in two different tones and for the second one we decided on a white wash coastal themed design for which we grabbed Rust-oleum Chalked in Linen White and a bucket of water.
To do a white wash apply some chalked paint to the tree (doesn't need to be done too perfectly) then dip the brush into the water and go back over the painted area to wash off some of the colour and spread it thinner. Continue with this mix of painting and washing until the tree is fully painted.
Step 5. Add decorations, lights and get your present collection going.
Tip: If you feel like the tree is too opaque just grab an old rag and wipe off some of the paint, then add some extra water to thin it out further.
2. Christmas Decorations – Wooden Christmas Presents

To get the outside of your house looking magical we created some decorative Christmas presents out of wooden blocks. If you plan to place the presents inside your home you could also use card board boxes with some sandbags or another slightly heavier item inside the box to keep the presents from falling over.
Grab a paintbrush and some chalk or spray paint as well as some ribbons, pine cones and greenery. Paint the boxes in a darker base tone (this colour is the one you will see around the edges as you sand back the top coat later to create the distressed look) and once dry paint on a second layer in your colour of choice. If the dark base still shines through, apply a second coat. Once dry, distress the edges and tie the ribbon around the box before adding additional decorations like name tags and pine cones to your DIY outdoor décor.
These presents are super easy to make and a definite eye catcher.
Tip: Colour coordinate with your pallet tree and place the presents in front of it.
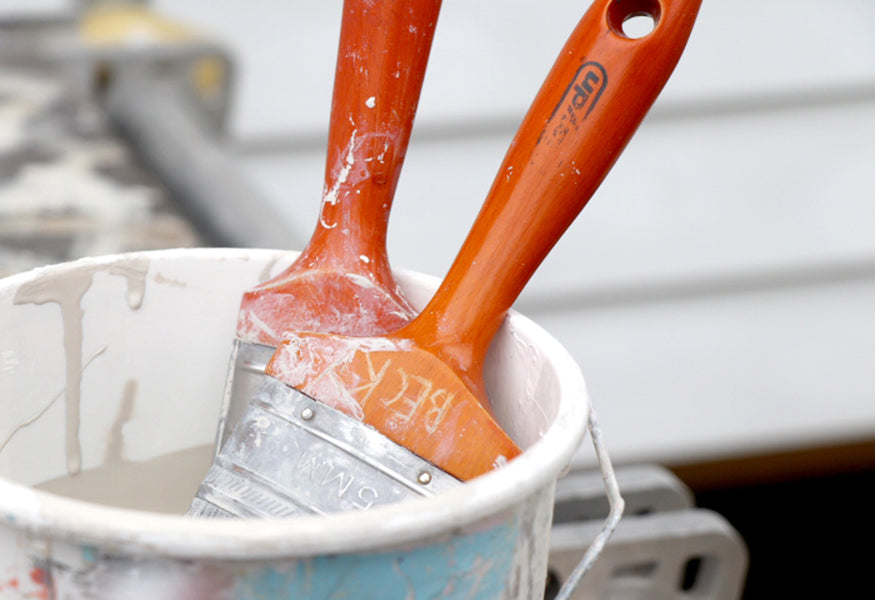
3. Tree Ornaments – Paint Brush Santa

If you have some old paint brushes lying around we got a great tip to reuse these and make some truly unique tree ornaments. For Santa, natural or light coloured bristles work best, however dark bristle brushes can be used to make elves or reindeers as well.
Don’t worry if you have your own little Christmas elves wanting to help, this DIY project is easy to do and childproof….
Paint the handle of our paint brushes in a bright Santa red then glue white fabric around the ferrule leaving only a small space to glue eyes and a nose onto the ferrule before the bristle forms the Santa beard. Once the red paint on the handle is dried it can be decorated with white paint to create a unique Christmas pattern.
To create the reindeer simply swap the white felt for a brown shade and cover the whole ferrule with it then add two big eyes and a nose. Add candy canes as ears or pipe cleaners as antlers and Santa's helper is ready for the season.
Pull a ribbon through the hole at the top of the handle, tie a knot and your personal Santa ornament is ready to go up on the tree.
4. Christmas Countdown Chalkboard

If you don't want to invest in a full advent calendar this season our Chalkboard project is a great solution to add to the Christmas excitement. Grab some Rust-oleum Chalkboard Paint, a small brush, a large flat piece of wood (at least A4 size) and two small wooden cubes.
Paint the front of the wooden board and all sides of the small cubes with the chalkboard paint and leave it to dry. Get some Christmas ribbons and bows to decorate the borders of the sign, then use chalk in different colours to write your festive message on the board and the cubes to add the countdown. The Chalk will wipe off easily so you can change the message and adjust the countdown at all times.
Tip: If you keep the decorations more neutral you can reuse the board throughout the year for other occasions as well.
5. Wall Decorations - Christmas Bells

Jingle bells, Jingle bells, jingle all the way… small terracotta pots are perfect to create some DIY magic. All you need is a rope, some spray paint and small decorative stones or ribbons and a jingle bell to be placed inside each terracotta bell. The miniature planter pots are inexpensive and look super cute placed around the house, in the tree or around the porch.
Alternatively you can also use some takeaway coffee cups to make the bells. Wash the cups out and leave them to dry for a few days before getting the spray painting started. Once dry, grab a snap knife and cut a small opening for the rope to go through.
This DIY idea can be turned into a family project by swapping the spray paint for a paint brush and paint test pot….
Apply paint to the pots inside and out. Depending on your colour of choice multiple coats may be necessary.
Once dry, grab the jingle bell and the ribbon, attach the bell to the end of the ribbon and threat. it through the pots opening. Tie a knot to keep the bell from pulling more ribbon through. Decorate the outside with glitter, ribbons or pine and decorate your home with your new Christmas bells.
Tip: Attaching a safety pin to the top of the rope makes it easier to get the rope pushed through the cut.